Once you have achieved a badge from moodle.oeru.org, you may wish to share it with friends, family, colleagues or other contacts.
On this page, you will learn how to:
Set up a digital ‘backpack’ for your badges
If you wish to share your OERu Moodle badges on social media or put them in a collection with other badges you have earned, you will need to create a ‘backpack’ – a digital way to store your badges and the data associated with them.
OERu recommends use of Badgr for creating your digital backpack. Badgr issues and supports open badges, which maximise their flexibility and usefulness for learners. The following instructions apply to Badgr – if you wish to use another badging platform, please look at that platform’s website for instructions.
Create your Badgr account
(Omit this step if you already have a Badgr account.)
- In your browser, go to https://info.badgr.com/.
- Click Create account at top right of the Badgr home page. (See area circled in green in image below.)

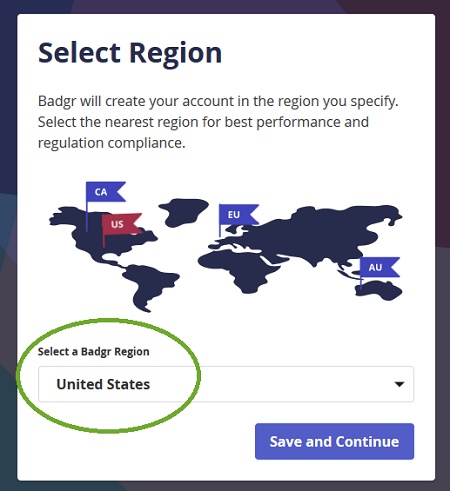
- Select United States as your region (this is necessary, wherever in the world you are actually based, to make the connection with OERu Moodle work), then click Save and continue. (See image below.)
- On the Welcome to Badgr (US) screen that appears, enter your email address and click Continue.
- You will see a screen asking you to enter a verification code. (See image below.)
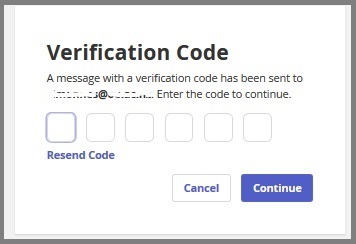
- Shortly afterwards, you should receive an automated email from Badgr, telling you what the verification code is – type this code into the boxes on the screen.
- Note: If you do not receive the email from Badgr, check your junk mail folder. If it is not there, contact your email provider or your organisation’s IT department to see if the email has been excluded by a spam filter.
- Follow the instructions on screen to complete the creation of your new Badgr account.
Connect your OERu Moodle account with Badgr
- Log in to https://moodle.oeru.org.
- # Click on your name or picture at the top right of your Moodle screen.
- Click on Preferences in the drop-down menu that appears (as shown in the image in the previous section).
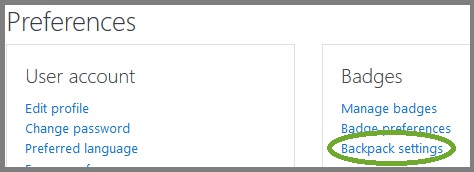
- Click on Backpack settings under the Badges heading. (See image below.)
- On the backpack settings page, enter the email address and password that you used for your Badgr account and click Connect to backpack. (See image below).

- You will see a screen saying Verification pending and an email will be sent to you.
- Click on the link in the email to confirm and activate the connection to your Badgr backpack.
- You will be taken back to your Moodle account (you may need to log in again) and will see a screen confirming your Badgr backpack connection.
- Return to the Manage badges screen (via Preferences again).
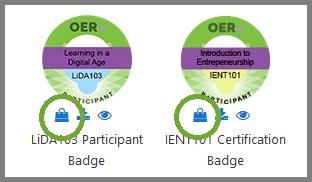
- Click the small briefcase icon under each badge to add it to your Badgr backpack. (See image below.)
- Sign in to Badgr again to view the badge in your backpack. (Note that if you are already signed in to Badgr, you may need to refresh your screen, or even log out and log in again, to be able to see your new badge in the backpack.)
Share your badge through your digital networks
From your Badgr account, you can share your badge on websites, email, social media, and professional networking sites such as LinkedIn.
- Full instructions for sharing your badges on different platforms are provided in the Badgr Knowledge Base.
- Note that you may want to uncheck the Include Recipient Identifier option when you are setting up sharing in Badgr – if this remains checked then your email address will appear alongside the badge wherever you share it.
Once you have achieved a badge from moodle.oeru.org, you may wish to share it with friends, family, colleagues or other contacts.
On this page, you will learn how to:
Set up a digital ‘backpack’ for your badges
If you wish to share your OERu Moodle badges on social media or put them in a collection with other badges you have earned, you will need to create a ‘backpack’ – a digital way to store your badges and the data associated with them.
OERu recommends use of Badgr for creating your digital backpack. Badgr issues and supports open badges, which maximise their flexibility and usefulness for learners. The following instructions apply to Badgr – if you wish to use another badging platform, please look at that platform’s website for instructions.
Create your Badgr account
(Omit this step if you already have a Badgr account.)
Connect your OERu Moodle account with Badgr
Share your badge through your digital networks
From your Badgr account, you can share your badge on websites, email, social media, and professional networking sites such as LinkedIn.